The TapHome system supports access control through various devices:
- Card readers
- PIN code entry keyboards
- Combined card readers and PIN code entry keyboards
The Wiegand Gateway 2W/2DI/2DO supports up to two Wiegand interfaces.
Setup Guide
Enable the reader
- Navigate to Devices
and search for the Wiegand Gateway device named
W2DI2DO2. - In the Wiegands section, enable the reader.
- Navigate to Devices
and search for the Wiegand Gateway device named
Add an access card
- Navigate to Settings → Access and tap Add Access Card .
- Select the reader.
- Add the card.

Adding Cards

Editing Access Card Validity
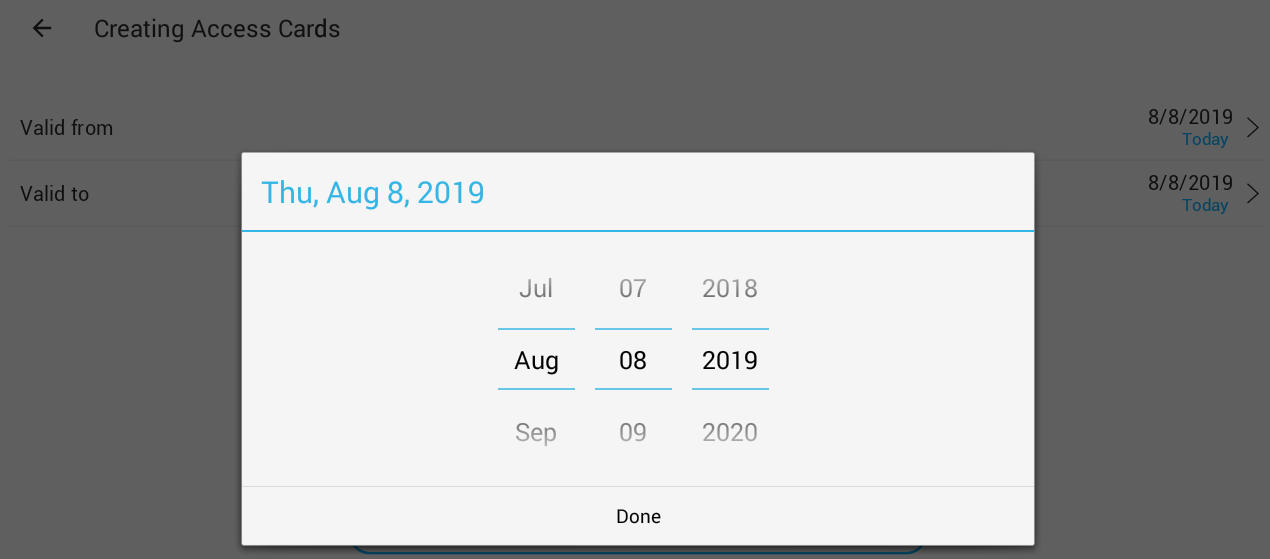
When setting up an access card, you can adjust its future validity before saving. Additionally, you can change the validity later in the card details.
Validity Options You can define specific dates for:
- Valid from – the start date when the card becomes active.
- Valid to – the expiration date when the card is no longer usable.
It is also possible to set the card’s validity to unlimited by clicking Set unlimited validity . This ensures the card remains permanently active without an expiration date.
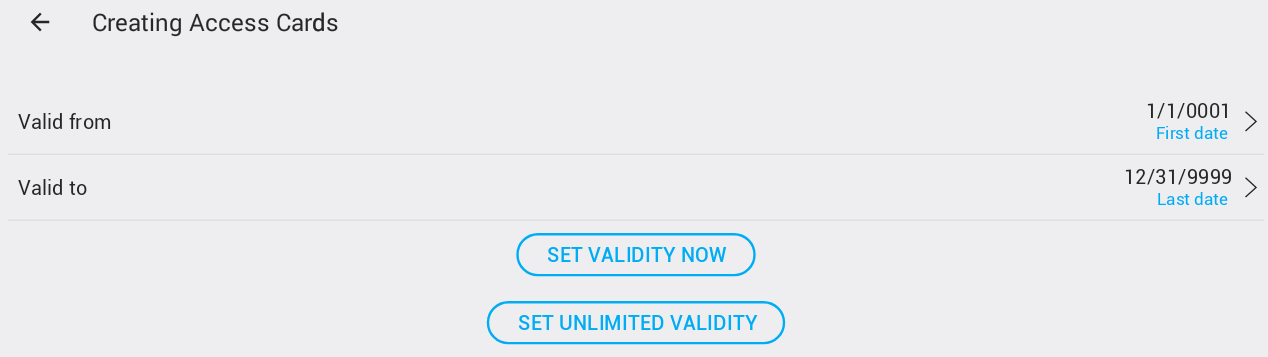
If you want to set a specific time for a card that previously had unlimited validity, it is convenient to first click Set validity now . This sets the current date as the validity, allowing you to adjust the “Valid to ” parameter to the desired expiration date.
After setting the validity, there are three ways to add a card to the system:
Create a Virtual Card
A virtual card can be defined for a reader with a keyboard. A virtual card is simply a PIN code . The system ensures that the same PIN code is not already defined and prevents duplicate cards. ⚠️ Access through PIN code only provides the lowest level of security and is not recommended.
Direct Entry of Card Code
Some card codes are printed directly on the card or listed in the delivery note. In such cases, it is possible to add the card without placing it on the reader – however, this is not recommended, as manually entering long numbers increases the risk of errors.
Adding a Card by Reading the Card Code
This is the most recommended method. After clicking add card, a To add a new card, attach the card to the device "{0}" opens. Placing a card on the reader that is not yet in the system will trigger a confirmation dialog.

Placing an already added card on the reader will display an error message.
After adding a card (or multiple cards), click Cancel to return from the card addition page to the card list. Cards are listed in the order they were added, but best practice is to select a user for each card immediately after adding it.
Access Card Properties
Clicking on a card in the card list opens the Access Card Properties .
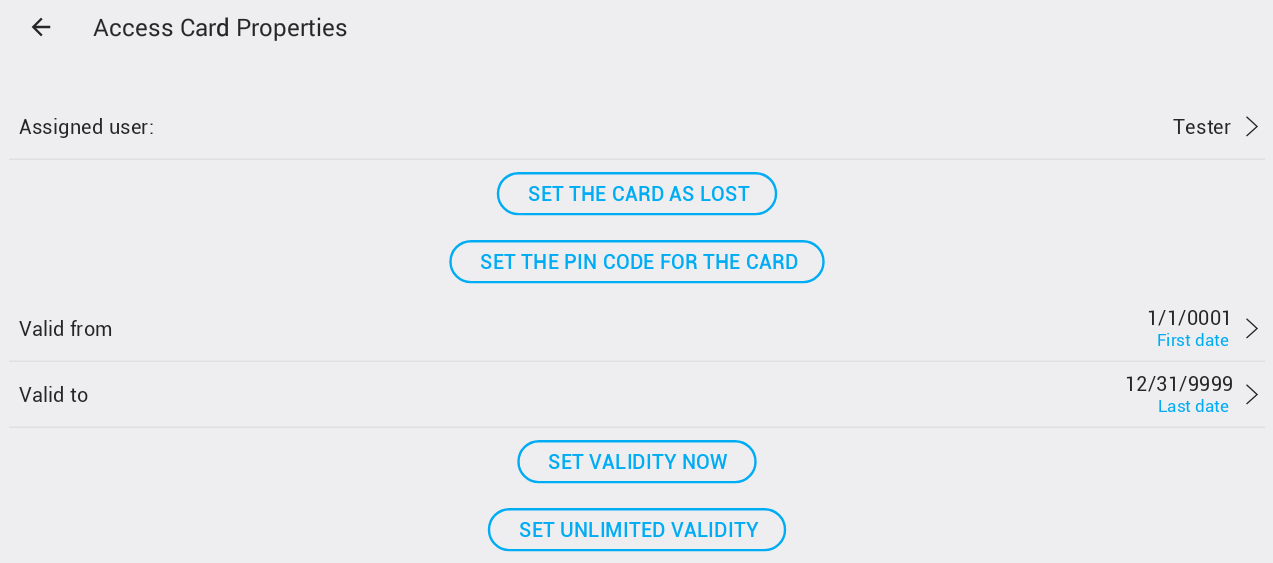
On this page, you can assign a user to the card or change the assigned user. Access logs are created based on the user, not the card, so all previous access attempts with a card assigned to different users will be correctly recorded in the system.
A card cannot be removed from the system. If a card is lost or should no longer be used, click Set the card as lost . This will deactivate access using the card and you can also define special actions when access is detected using a lost card.
A lost card can be reactivated at any time by clicking Enable lost card .

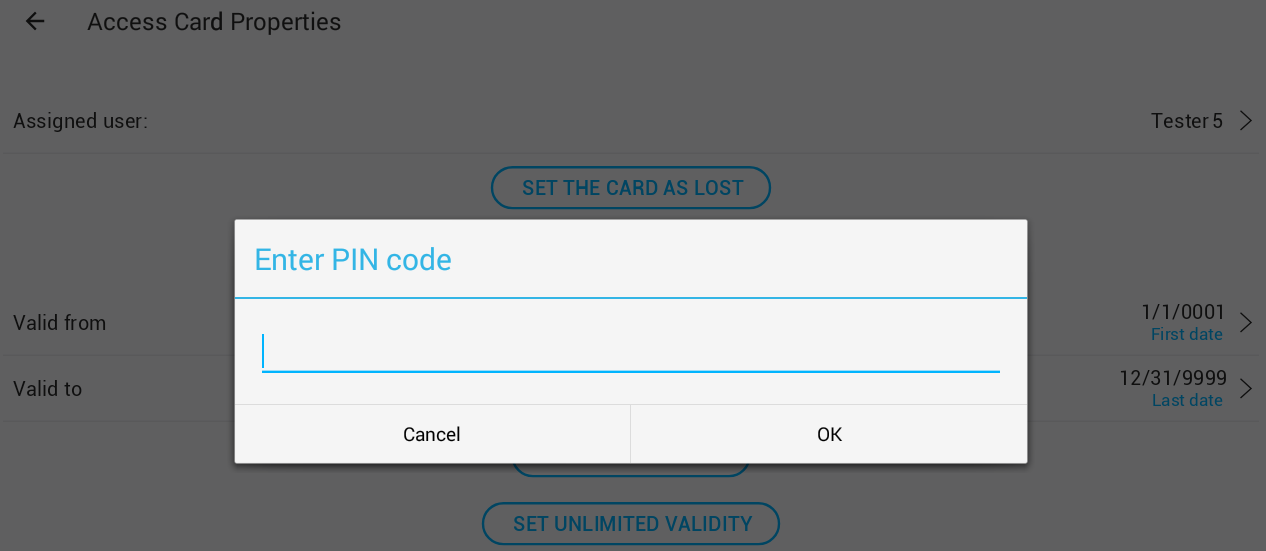
It is possible to define a PIN code for a card. When a PIN code is set, access is granted only when the card is placed on the reader and the PIN code is entered.
Entering an empty string for the PIN code will remove the PIN code from the card. ⚠️ It is not permitted to remove the PIN code from a virtual card.
It is also possible to redefine the card’s validity. This is very useful for temporarily assigned cards, for example.
Wiegand Device
Wiegand device service settings include the following parameters:
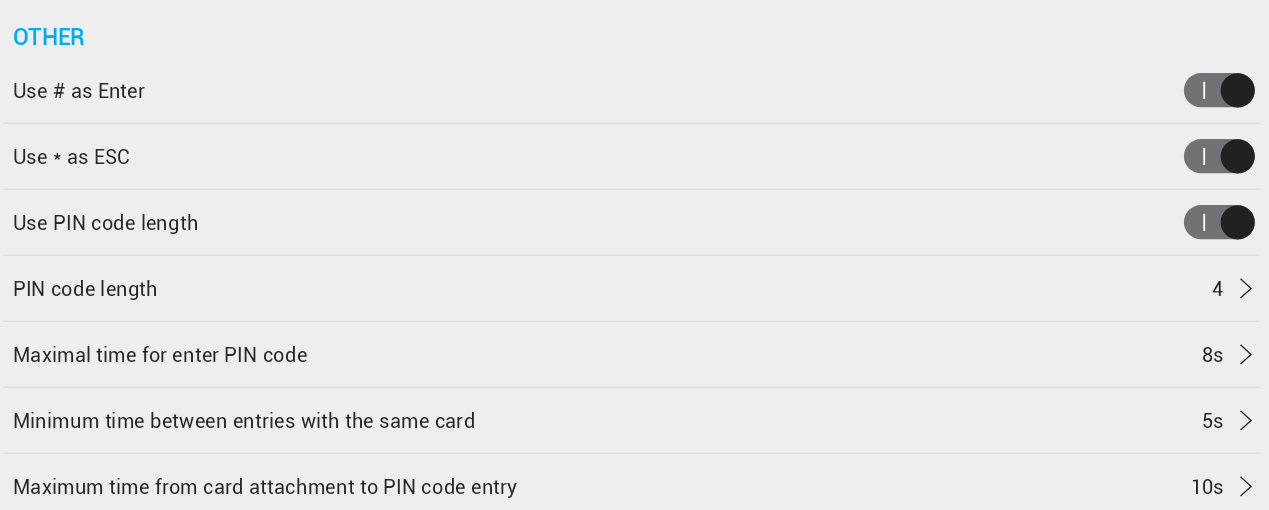
Use # as Enter – If enabled for readers with a keyboard, the
#character will complete PIN code entry.Use * as ESC – If enabled for readers with a keyboard, this setting allows the user to cancel PIN code entry and start over from the beginning.
Use PIN code length – If set, the PIN code length is used to automatically complete PIN code entry.
PIN code length – Parameter used when the previous setting is enabled as the PIN code length.
Maximum time between key presses when entering PIN code – Limits the time for entering the complete PIN code from the first entered number.
- If the entire PIN code is not entered within the defined time, all previously entered numbers are cleared and PIN code entry starts over.
Minimum time between entries with the same card – Limits repeated access using the same card.
Maximum time from card attachment to PIN code entry – Defines the time from placing the card (with PIN code enabled) to entering the complete PIN code on the keyboard.
Wiegand Access Definition
It is possible to define a user access list for weekly plans directly from the Wiegand service parameters.
Additionally, you can edit access card parameters, including:
- User assignment to the card
- Changing validity settings
- Adding a card as described in previous chapters
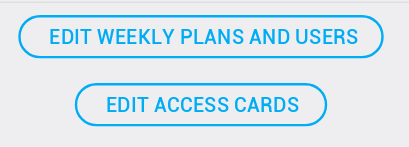
For each reader, you need to define times and dates (weekly plans) during which listed users have permission to access the device. To perform this step, click Edit weekly plans and users .
Click Add a weekly plan .
Select from predefined weekly plans.
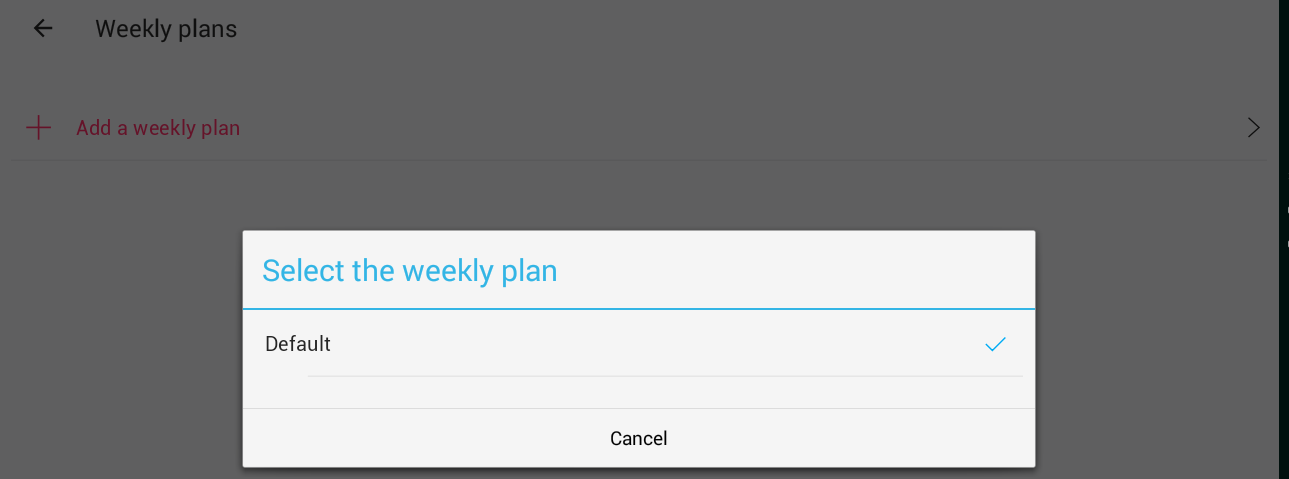
The Default weekly plan is set to allow access anytime and on any date.
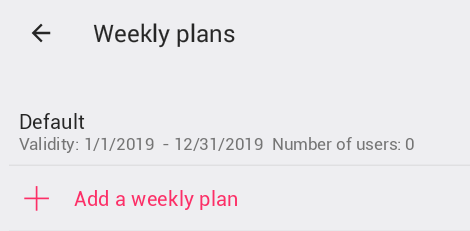
After adding a weekly plan for the reader, it will appear in the list. Clicking on the plan opens the user management page, where you can add or remove users.
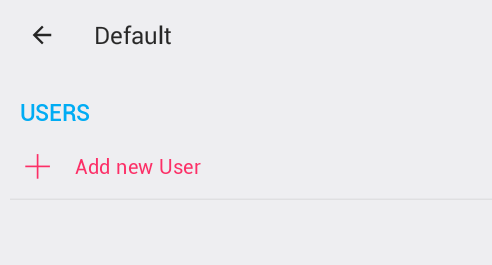
Clicking Add new User opens a user selection dialog, where you can select one or more users who will have permission to access through the device with the selected weekly plan.
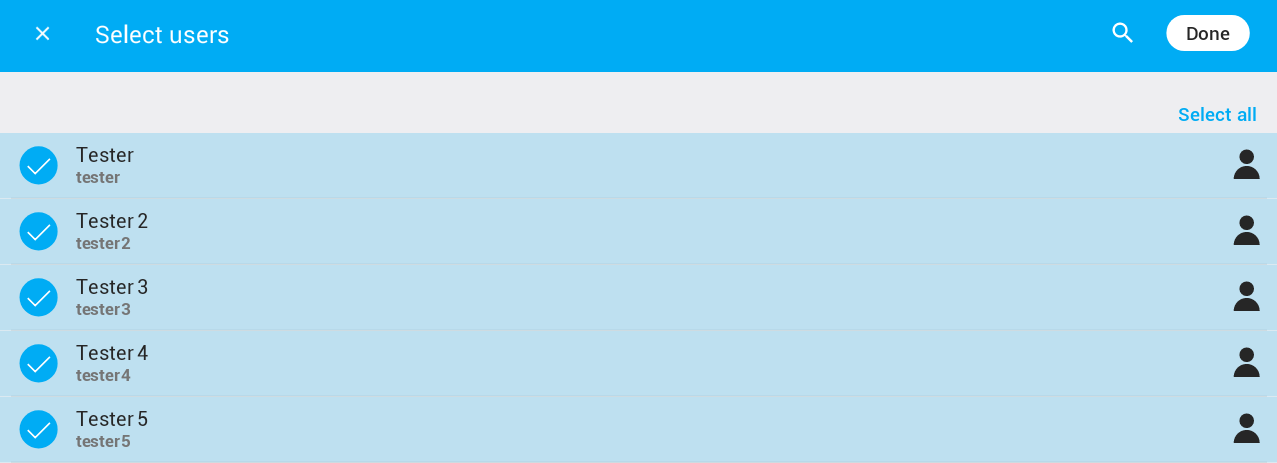
Click Done to complete the selection – the user list will update:
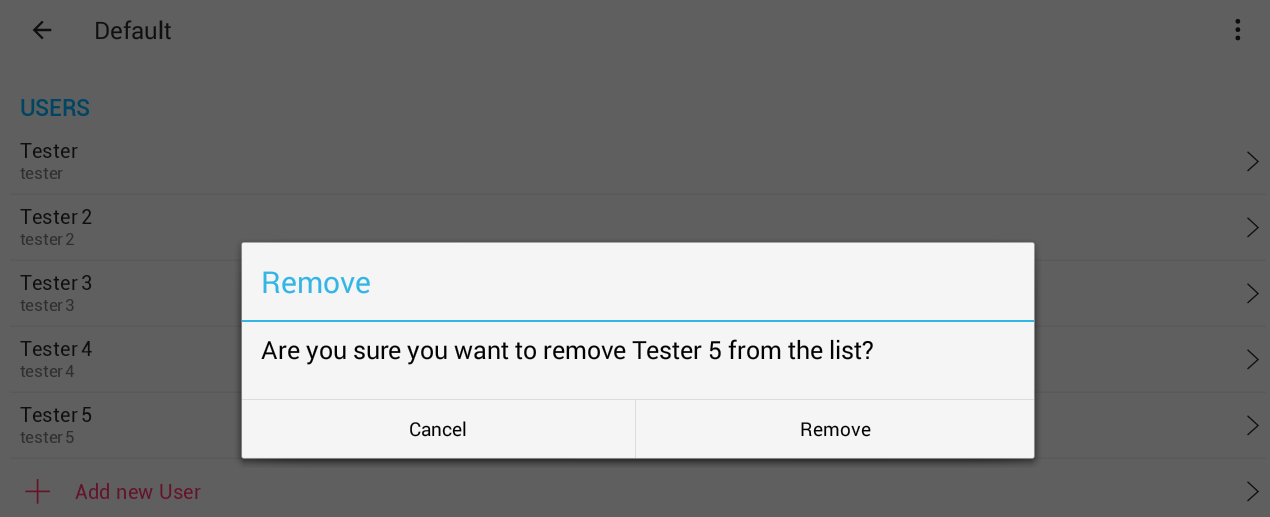
To remove a user, click on them and confirm or cancel your selection:
After completing user selection and returning to the weekly plan list, the Number of users in the list will update:

Now users can gain access to this device using a card or PIN code during times defined in the weekly plans where they are listed.
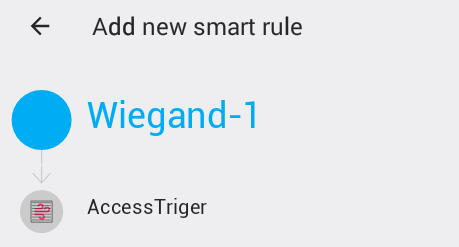
Access Trigger
For card readers, it is recommended to use the Access Smart Rule trigger.
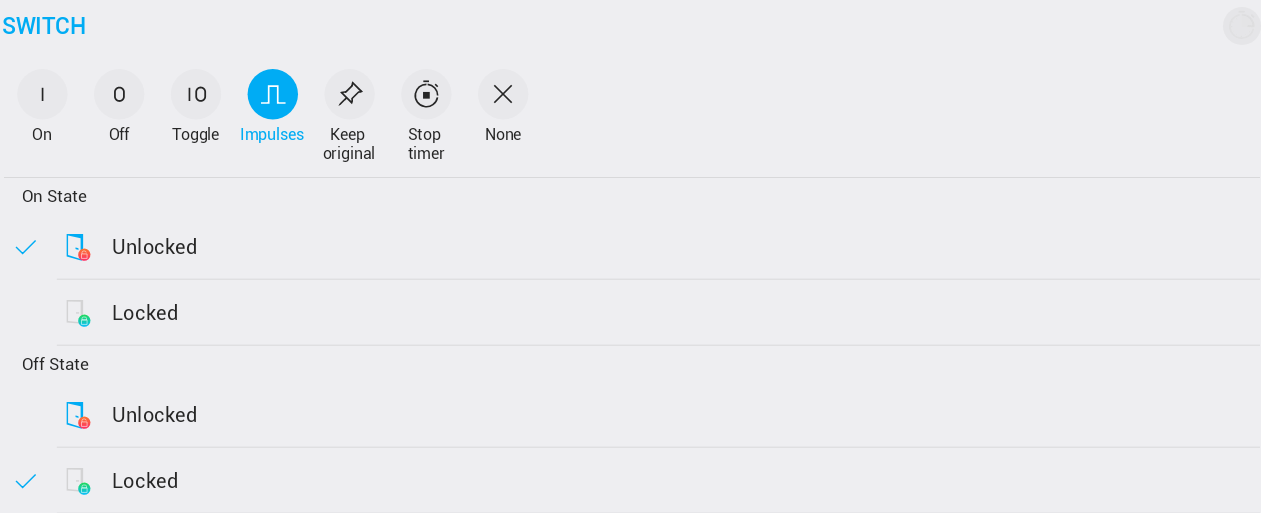
The access trigger can define different actions for:
- Access granted: {0}
- Access with expired card actions
- Access with lost card actions
- Access in too short time actions
For example, when granted access should be used to open a door for a limited time, the action can be defined as an impulse with the following parameters:
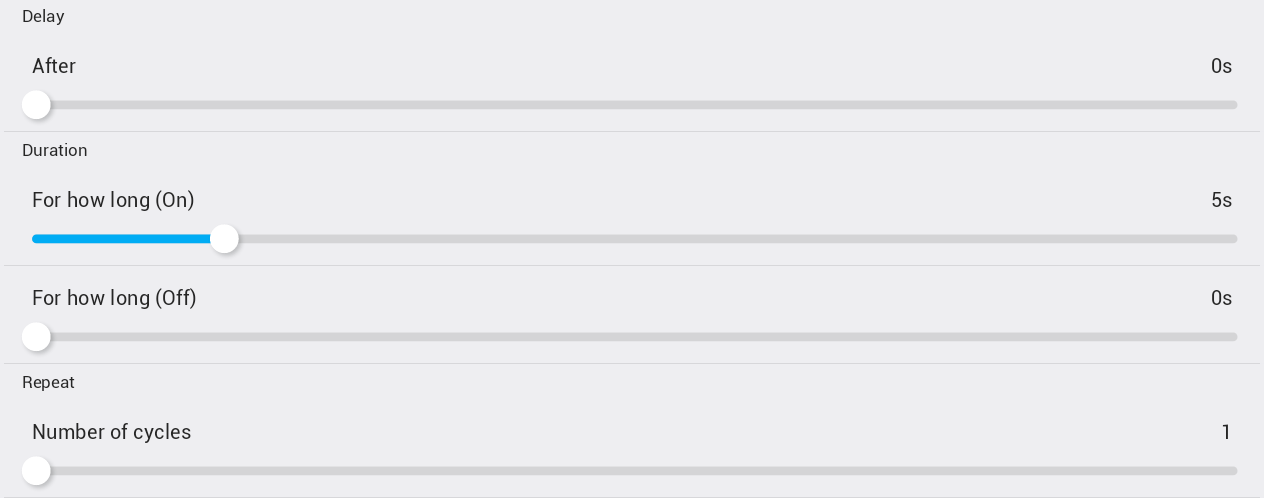

This will open the door for 5 seconds after access is granted.
Clicking Display access log displays the access log for all card readers as expected.
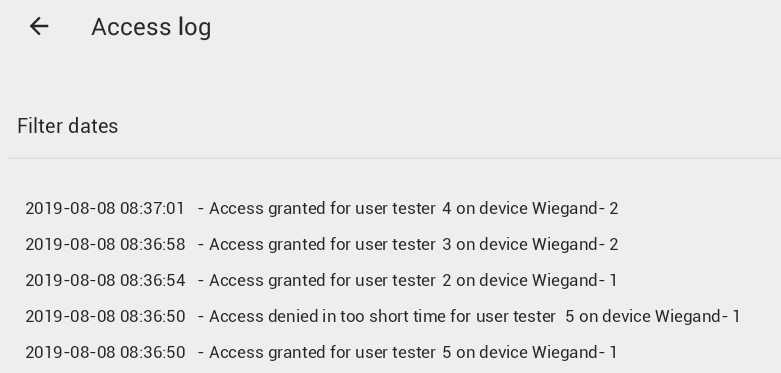
The log can be filtered by date.
When accessing from a specific card reader, only access records from that device are displayed.
The log is stored in the database for 30 days.
How to Add a New PIN Code for a Keyboard Reader
Create a virtual card
- Go to Settings → Access → Add Access Card .
- Tap on the Wiegand Gateway where you want to enable the PIN.
- Select Create virtual card - only PIN code .
- Enter your PIN code (default minimum 4 characters, can be adjusted later).
- Tap Valid to and select a future date.
- Go back. The card is now created and appears at the end of the Access cards list.
No user is assigned yet.
Assign a user to the PIN code
- Tap on the new card.
- Tap Assign user.
- Select your TapHome account.
- At the bottom, tap Set unlimited validity .
- Tap Back .
Configure weekly plans for PIN
- Scroll up and tap on the Wiegand Gateway for which you are configuring the PIN.
- Tap Service settings .
- On the next screen, tap Edit weekly plans and users .
- Tap Add a weekly plan or select an existing weekly plan.
- Tap Default weekly plan.
- Tap Add new User .
- Select the account.
- Tap Back multiple times.
Test the new PIN
- Test your new PIN!