Akuvox R20A Video Doorbell Configuration Guide
Overview
This documentation covers configuring an Akuvox R20A video doorbell with TapHome home automation system.
Device Setup (Akuvox Web Interface)
Intercom - Basic Settings

- Set Push Button key number to 111
- Configure Max Call Time to 2 minutes (TapHome Core enforces 2-minute limit)
- Enable “Push To Hang Up” for immediate call termination
Intercom - Relay Settings
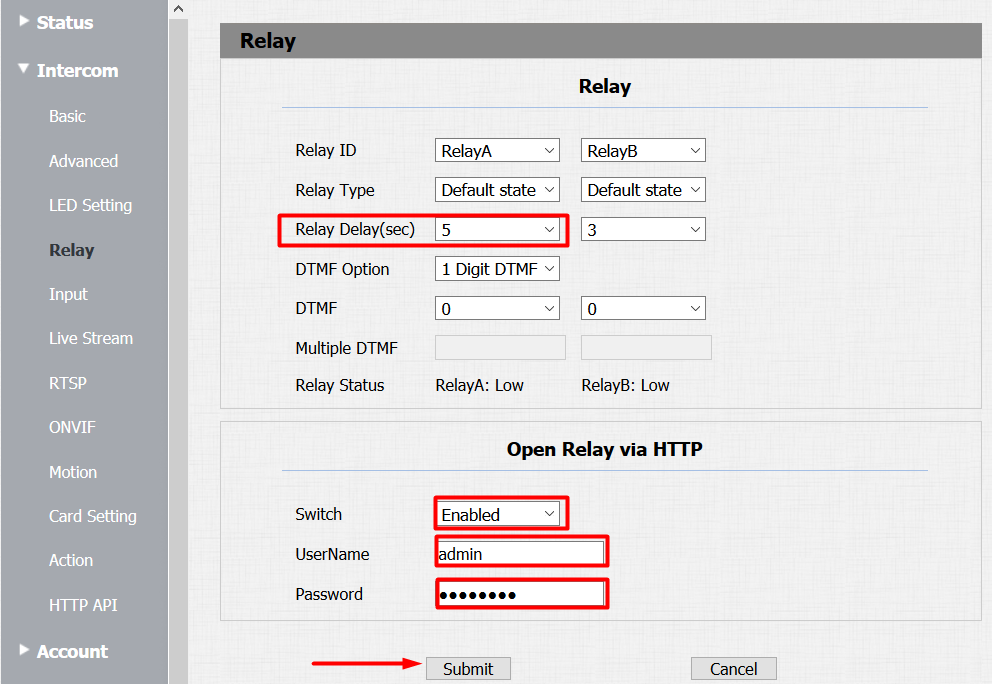
- Set Relay Delay in seconds (matching TapHome HTTP switch settings)
- Enable Packet parser for door switch control
- Configure username as “admin” with matching device password
Intercom - RTSP Configuration
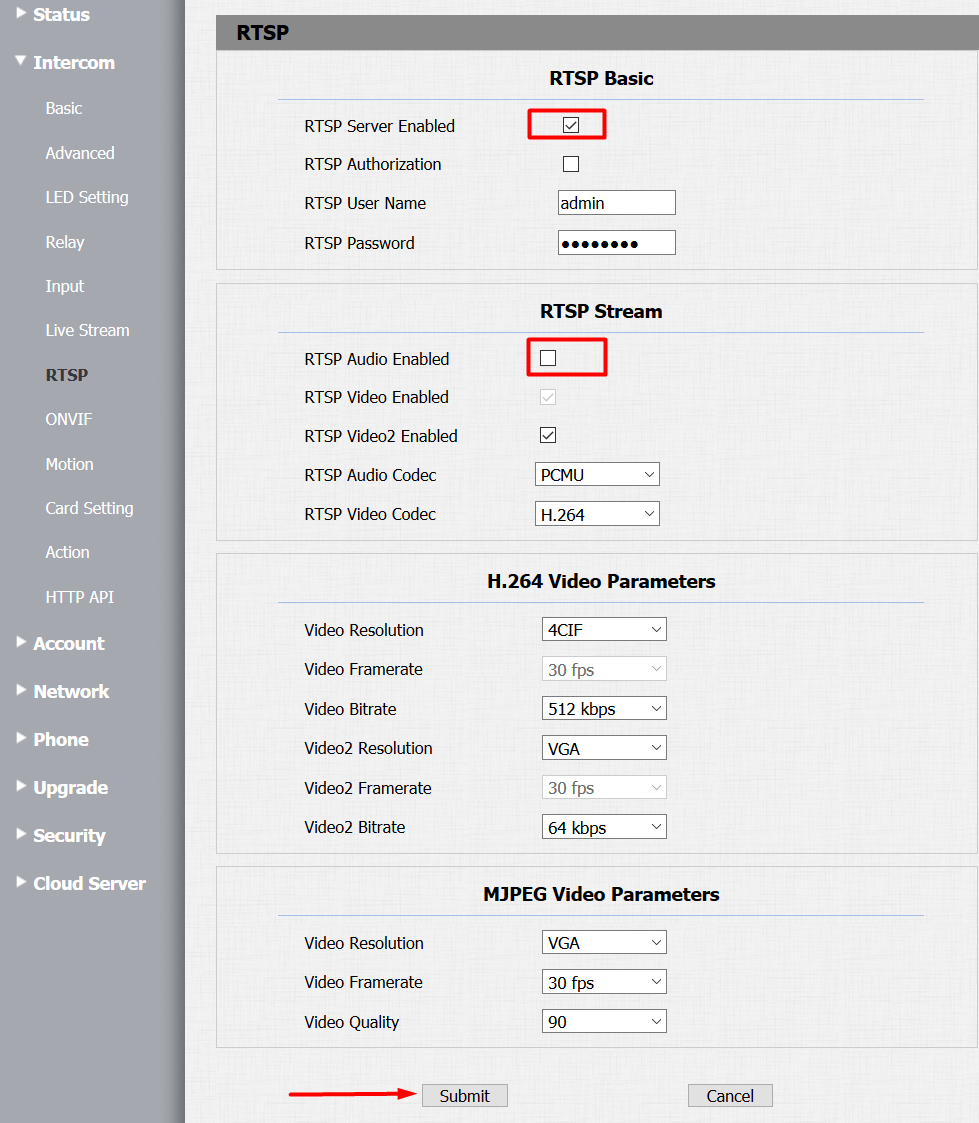
- Enable RTSP Server
- Disable RTSP Audio (transmitted via SIP instead)
Intercom - HTTP API
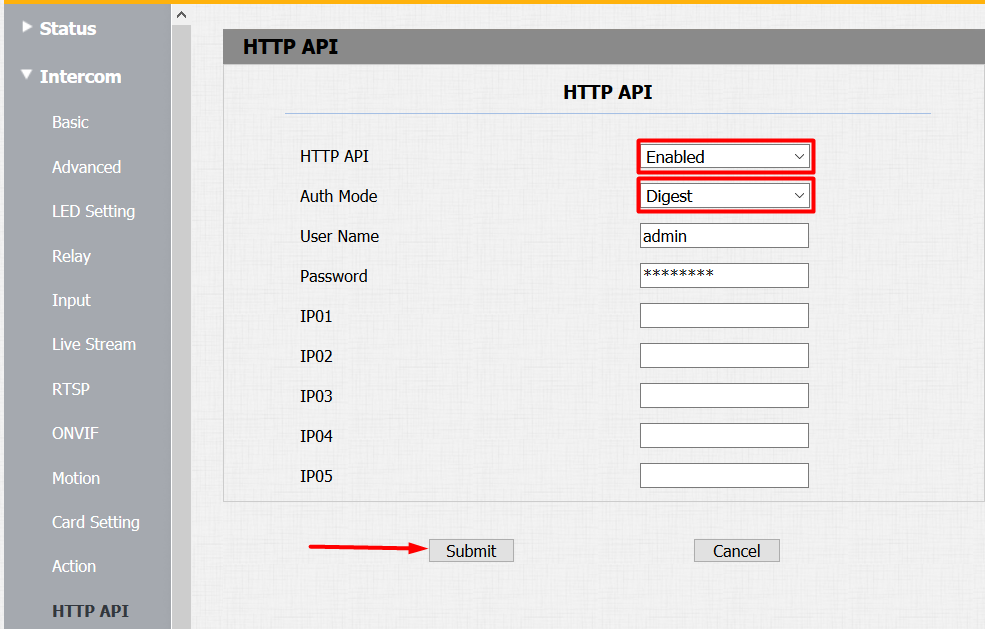
- Enable Packet parser
- Set Auth Mode to Digest
Account - Basic Settings
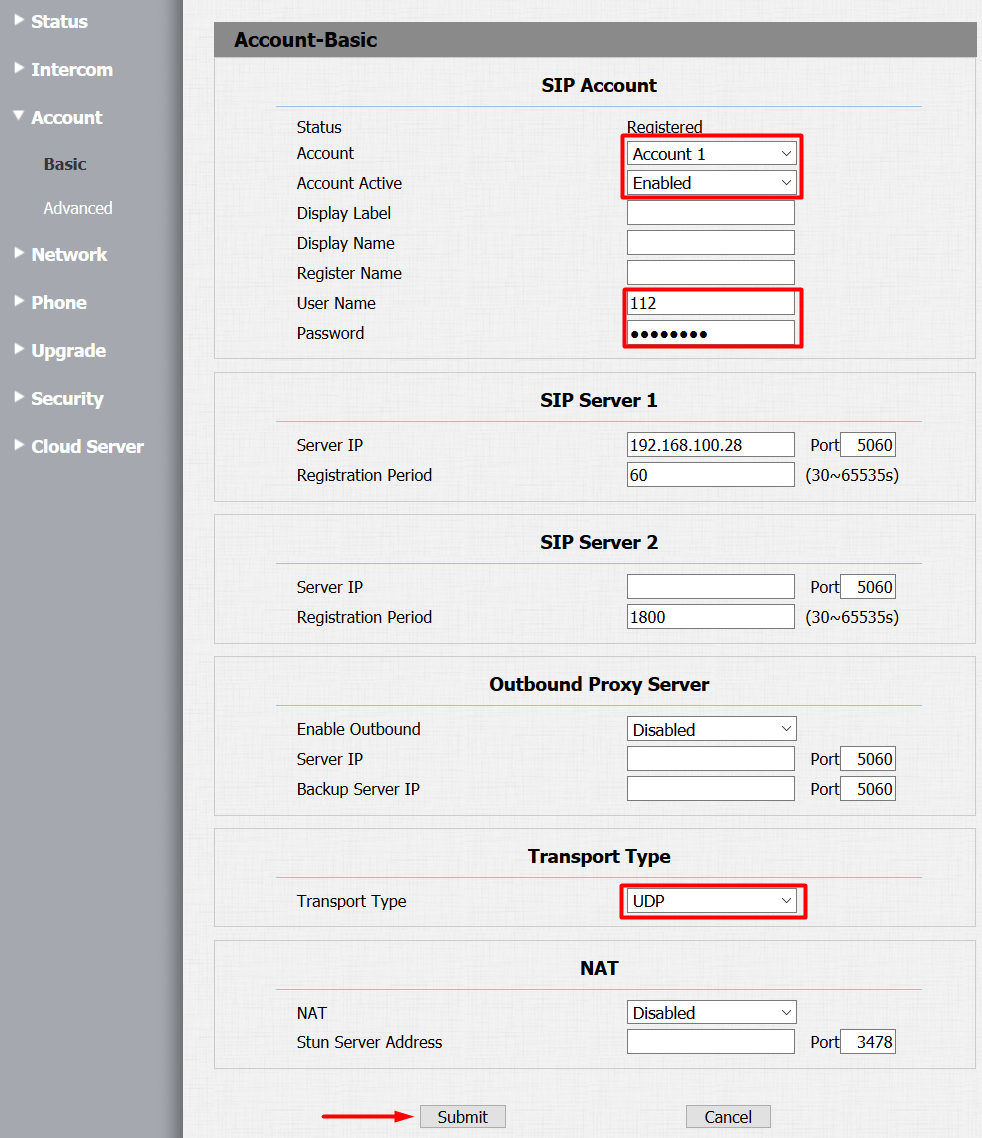
- Select Account 1 and enable it
- Set User Name to 112
- Configure SIP Server 1 to TapHome Core IP address
- Use static IP addresses for both devices and doorbell
- Set Transport Type to UDP
- Status should show “Registered” when configured correctly
Account - Advanced Settings
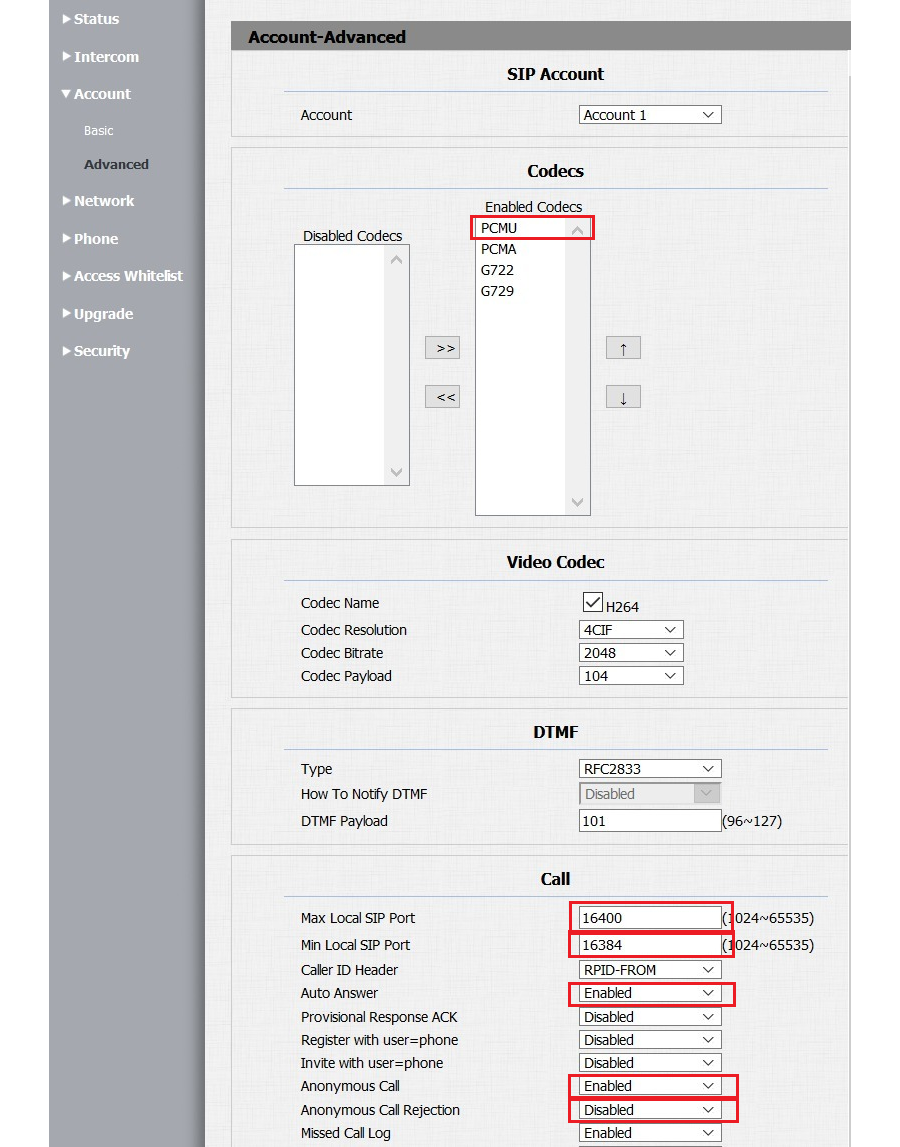
- Enable PCMU audio codec
- Enable Auto Answer
- Enable Anonymous Call with rejection disabled
- Set SIP port range: minimum 16384, maximum 16400
Network Configuration
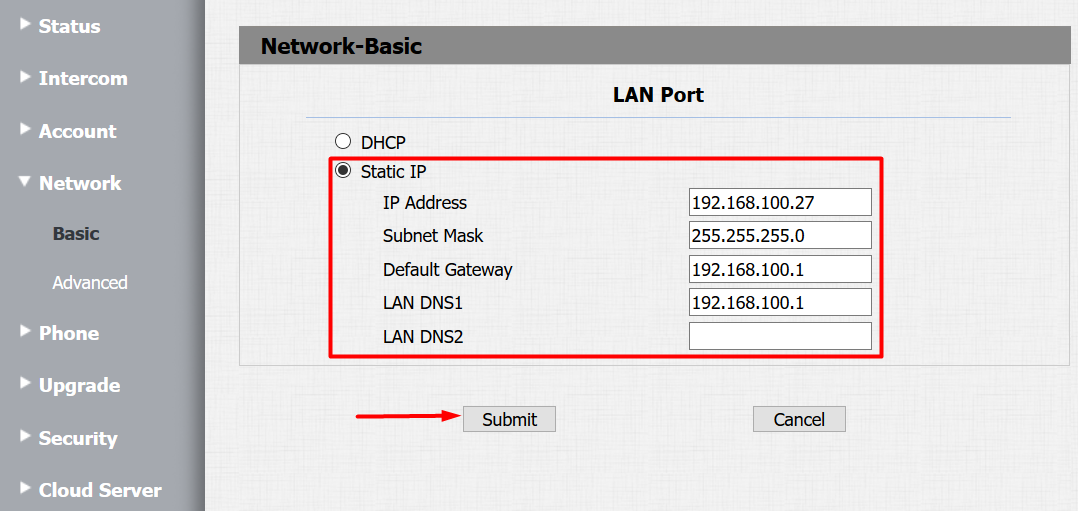
- Change from DHCP to Static IP mode for stability
Phone - Call Features
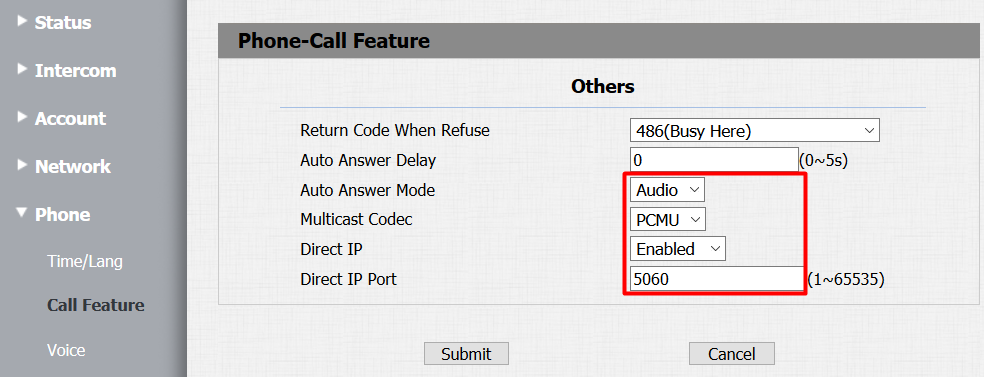
- Set Auto Answer Mode to Audio
- Set Multicast Codec to PCMU
- Enable Direct IP with port 5060
Phone - Voice Settings
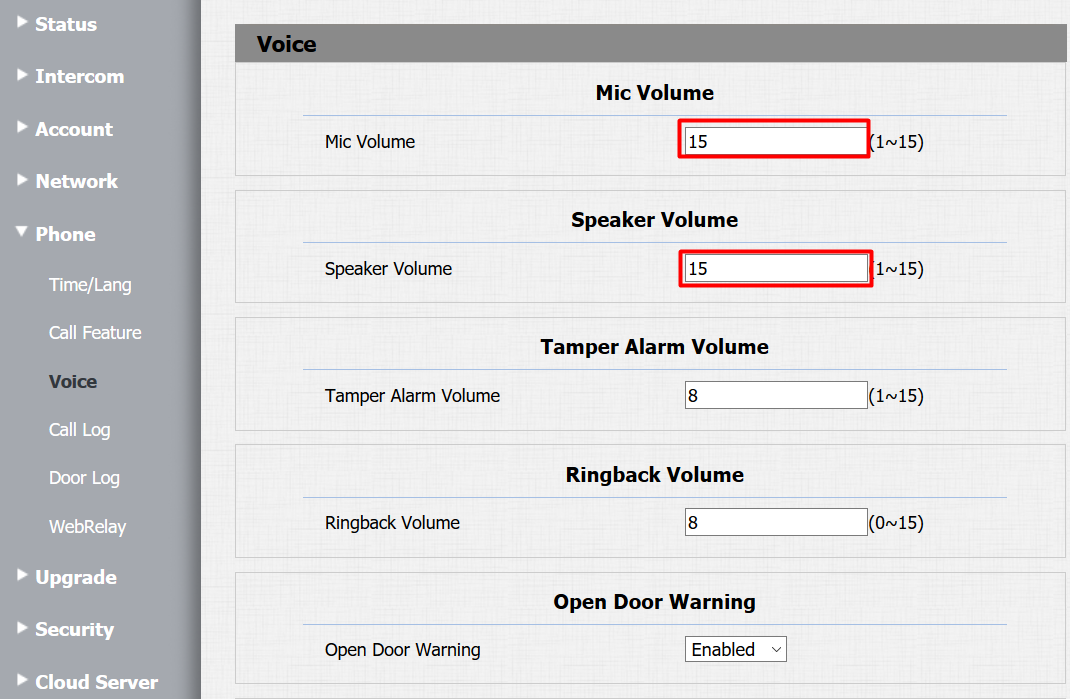
- Adjust Mic and Speaker Volume (recommended: volume 15 for speaker)
TapHome App Configuration
Video Stream Settings

- Low resolution:
/live/ch00_1 - High resolution:
/live/ch00_0 - Snapshot path:
/picture.jpg - Enable SIP
HTTP Switch Parameters
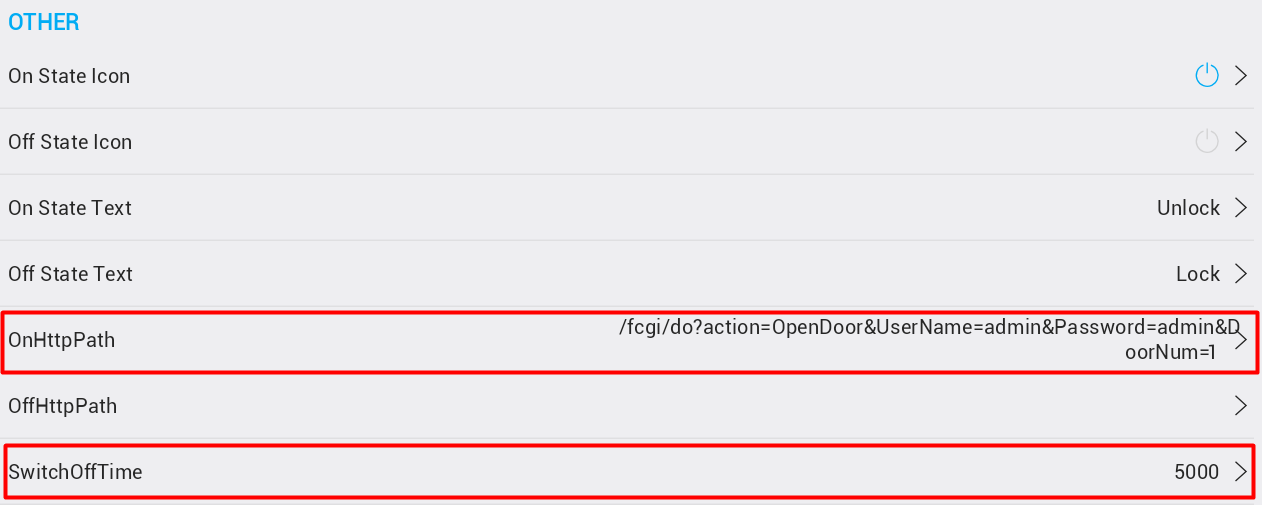
- Set OnHttpPath to:
"/fcgi/do?action=OpenDoor&UserName=admin&Password=xxxx&DoorNum=1" - Switch Off Time must match device Relay Delay value (in milliseconds)