Documentation
Akuvox
Configuration instructions for integrating an Akuvox R20A video doorbell with the TapHome home automation system, including SIP account configuration, RTSP streaming, and HTTP API setup.
Overview
This documentation covers configuring an Akuvox R20A video doorbell with TapHome home automation system.
Device Setup (Akuvox Web Interface)
Intercom - Basic Settings
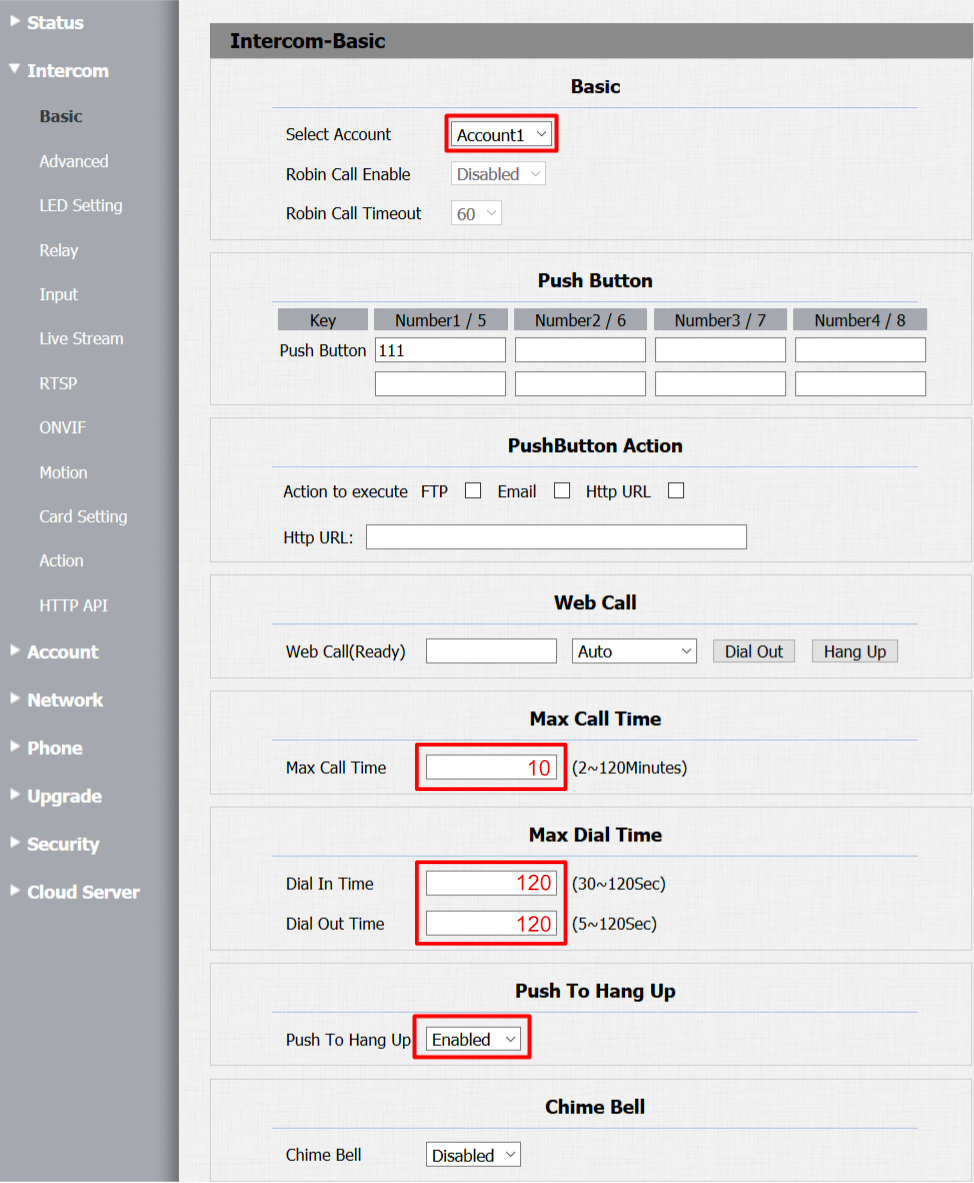
- Set Push Button key number to 111
- Configure Max Call Time to 2 minutes (TapHome Core enforces 2-minute limit)
- Enable “Push To Hang Up” for immediate call termination
Intercom - Relay Settings
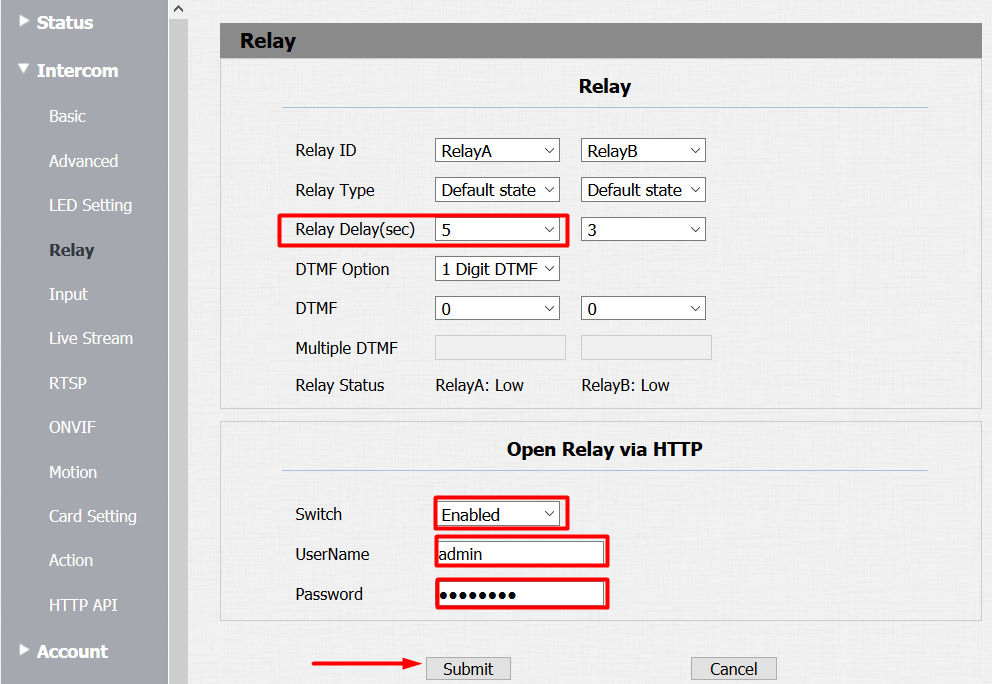
- Set Relay Delay in seconds (matching TapHome HTTP switch settings)
- Enable Packet parser for door switch control
- Configure username as “admin” with matching device password
Intercom - RTSP Configuration

- Enable RTSP Server
- Disable RTSP Audio (transmitted via SIP instead)
Intercom - HTTP API
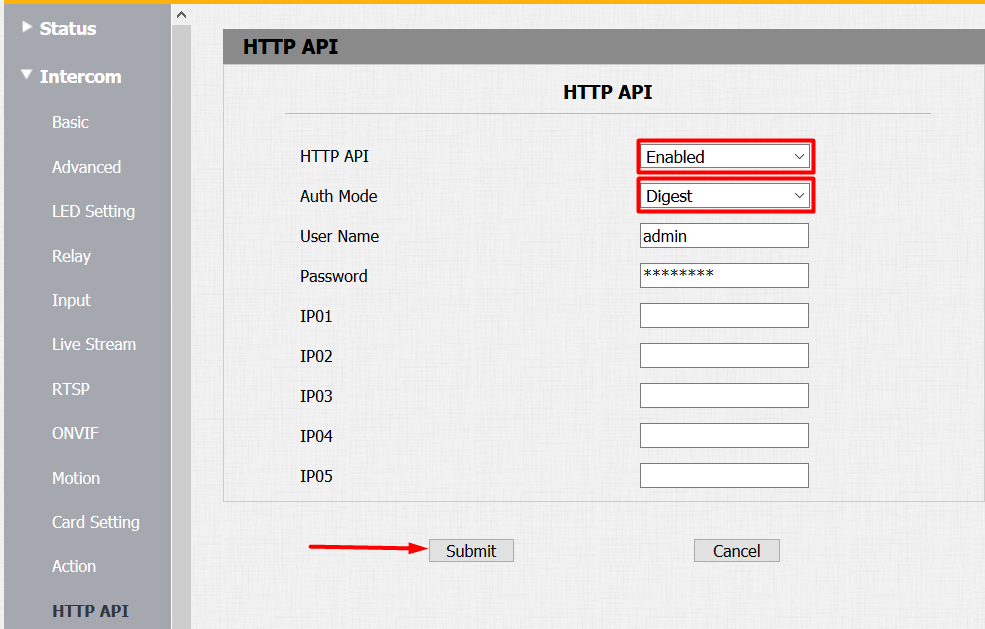
- Enable Packet parser
- Set Auth Mode to Digest
Account - Basic Settings
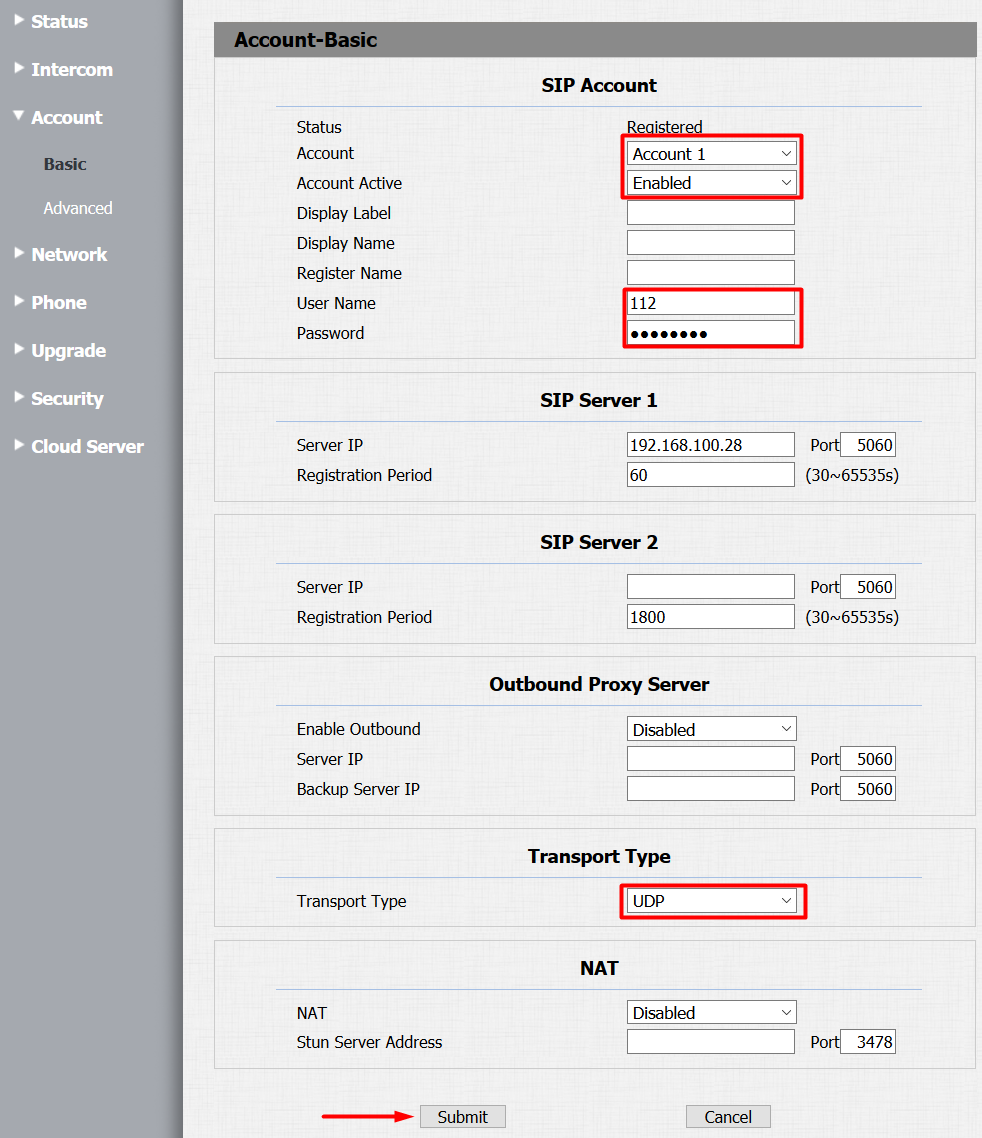
- Select Account 1 and enable it
- Set User Name to 112
- Configure SIP Server 1 to TapHome Core IP address
- Use static IP addresses for both devices and doorbell
- Set Transport Type to UDP
- Status should show “Registered” when configured correctly
Account - Advanced Settings
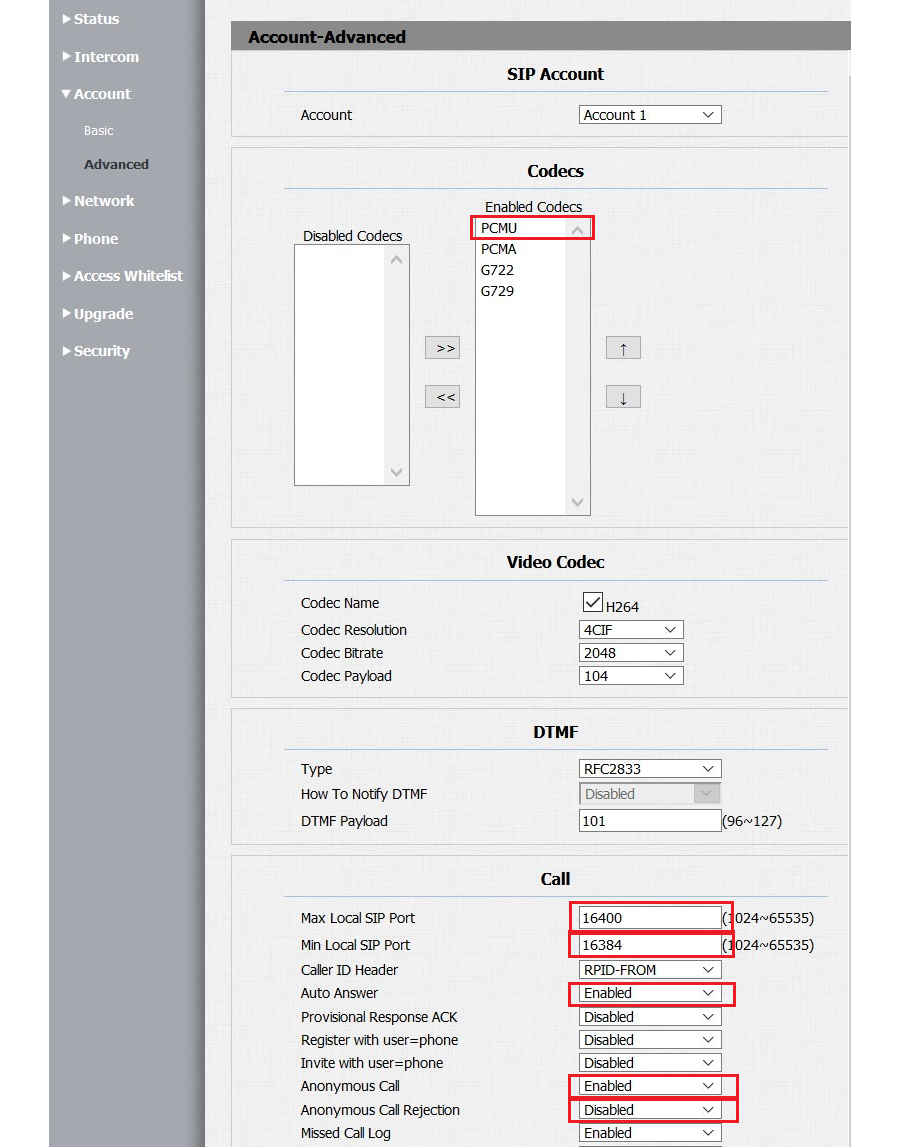
- Enable PCMU audio codec
- Enable Auto Answer
- Enable Anonymous Call with rejection disabled
- Set SIP port range: minimum 16384, maximum 16400
Network Configuration
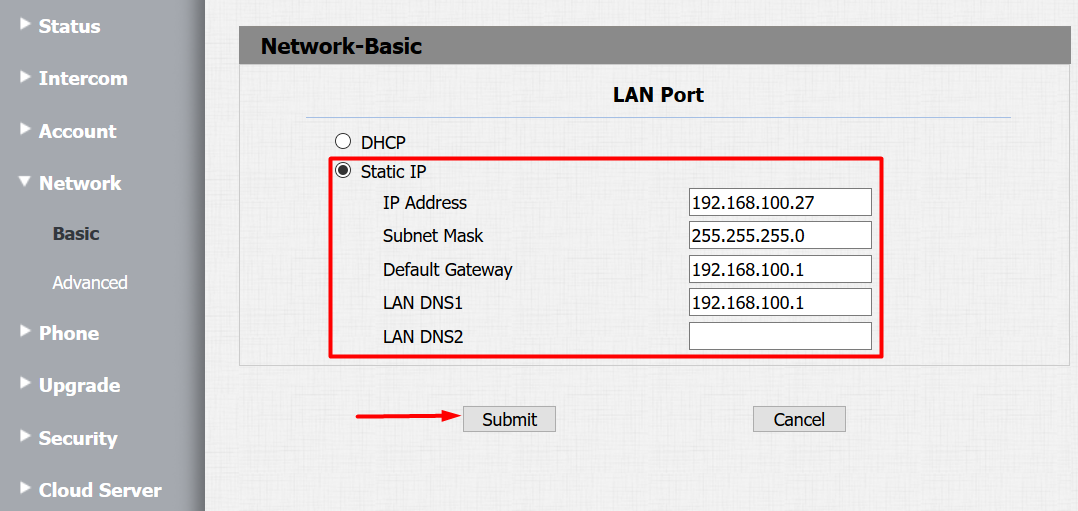
- Change from DHCP to Static IP mode for stability
Phone - Call Features
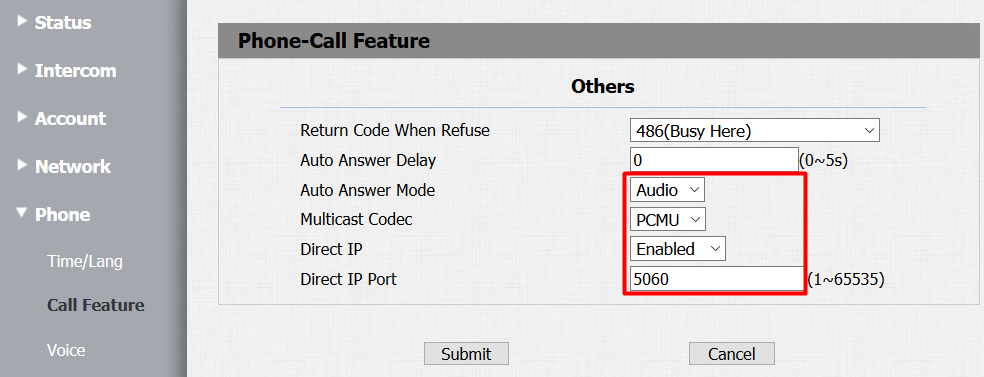
- Set Auto Answer Mode to Audio
- Set Multicast Codec to PCMU
- Enable Direct IP with port 5060
Phone - Voice Settings
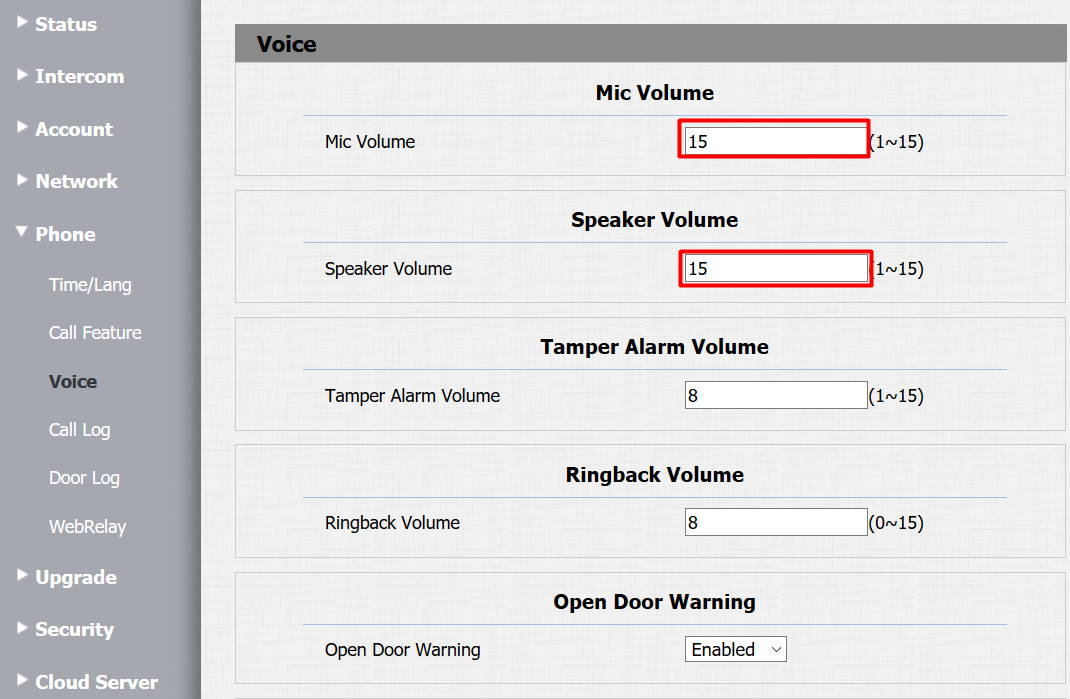
- Adjust Mic and Speaker Volume (recommended: volume 15 for speaker)
TapHome App Configuration
Video Stream Settings
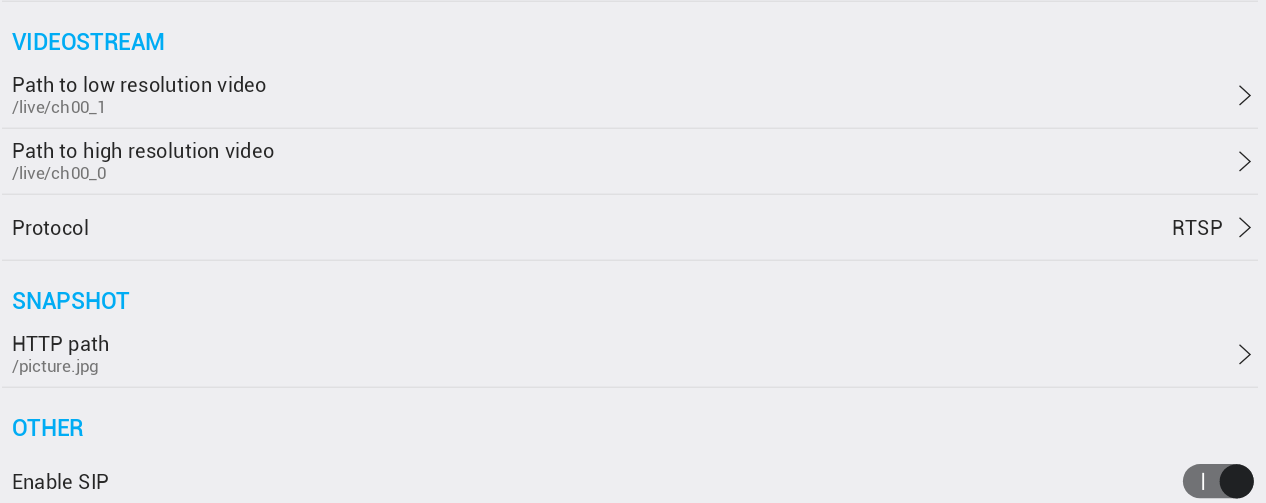
- Low resolution:
/live/ch00_1 - High resolution:
/live/ch00_0 - Snapshot path:
/picture.jpg - Enable SIP
HTTP Switch Parameters
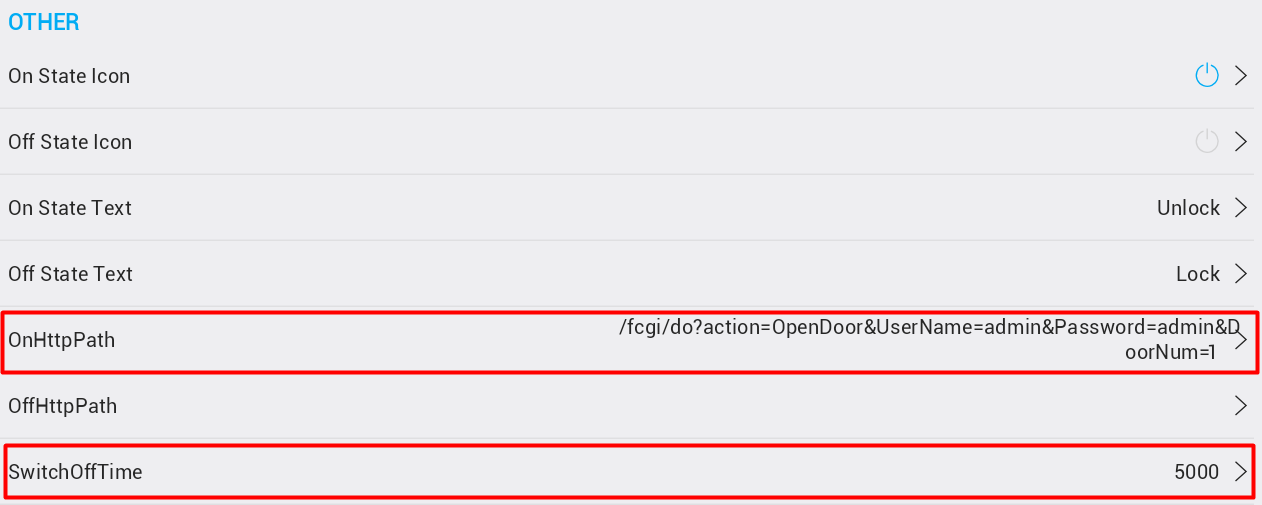
- Set OnHttpPath to:
"/fcgi/do?action=OpenDoor&UserName=admin&Password=xxxx&DoorNum=1" - Switch Off Time must match device Relay Delay value (in milliseconds)